

This post is about how to create a Windows 7/Vista Firewall
Disable and Enable shortcuts for your system desktop. Just by clicking on these
two shortcuts, you are able to enable or disable the Windows firewall instead
of going all the way through Control Panel. Follow these steps:
How to Create a Firewall Disable shortcut
1. Go to your desktop and right-click on an empty space and
from the drop –down menu, select New>Shortcut.

2. Copy and paste the string below under the Type the location
of the item and click on Next button.

3. Give a name for your shortcut like Disable Firewall and
hit the Finish.

4. Right-click on shortcut and from the menu, select
Properties.
5. In shortcut Properties window, go to Shortcut tab and hit
the Advance button.

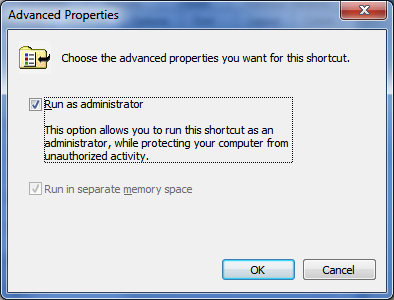
6. Select Run as administrator and OK the Advance Properties
window. If you do not enable this option, then your shortcut will not work.

7. Choose a proper icon for your shortcut. In my case I used
my own customized shortcut icon. OK the windows and you’re done.


How to Create a Firewall Enable Shortcut
1. Go to your desktop and right-click on an empty space and
from the drop –down menu, select New>Shortcut.
2. Copy and paste the string below under Type the location
of the item and click on Next button.

3. Give a name for your shortcut like Enable Firewall and
hit the Finish.

Steps 4, 5, 6 and 7 are same for this shortcut also.


 Tag
Tag

 Home
Home Privacy Policy
 Contact
 About
About
 Powered by Blogger.