

In this tutorial I’ll show you how to making your own CPU Meter and become aware of every moment of your CPU performance. In other words
you can find out what are your computer problems and are they software related
or hardware related? Also you can see how much each running program occupied
the CPU capacity.
To do this follows these steps:
To do this follows these steps:
1. First by pressing Ctrl+Alt+Delete run the Task Manager, click on the Options
Menu and enable Hide When Minimized and close the window.
2. Go to the Start
and enter the Search and search for taskmgr.exe (in the All Files and
Folders). After finding it, right click on it and select Send to>Create
Desktop Shortcut.
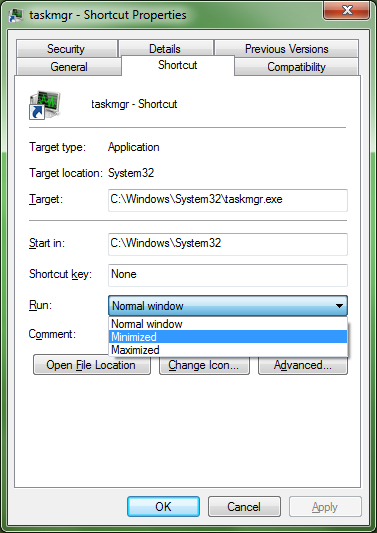
3. Go to the Desktop and right click on taskmgr icon, then
select Properties, find Run (above Comments) and in the submenu (drop down
list) choose Minimized and click on Apply.
In Windows 7 or Vista select Properties>Shortcut>Run and from the drop down menu click on Minimized.
4. Rename the shortcut name (taskmgr) to CPU Meter or
whatever you like.
5. right click on shortcut and select Cut, right click on
Start button and choose Open All Users, in Windows 7 or Vista go to
Start>All programs>Startup>right click>Open All Users and right
click and select Paste or simply press Ctrl+V. Just be sure to paste the shortcut
in Startup folder.
6. Restart the system.

Now whenever you start your computer, a small green icon will
be appeared in the System Tray and you can use it just by double clicking on it.For more
details and more accurate information about the CPU, you can double click on
the green icon and then under Performance, check all the cases, even about the
RAM and Kernel Time.
For viewing the time conflict with the Kernel, enable the Show Kernel Times in View menu, so in CPU Usage History, a red colored graph will be appear that shows the Kernel Time.
 Tag
Tag

 Home
Home Privacy Policy
 Contact
 About
About
 Powered by Blogger.