You can use the WordPress platform to create a free proxy by
adding a simple plugin to your website. You can even host the WordPress on
your local machine and use it as a proxy website. With RePress proxy you can
surf websites that are blocked in your country, school or office. As you may
know adding plugin to the WordPress blog is only possible if you use a hosting
service but not with a free WordPress account. But in this tutorial I’ll show
you how to host WordPress on your local machine using WampServer. If you
already have a hosted WordPress website, then you don’t need to use WampServe
and simply add the RePress plugin to your blog. Just follow the rest of
the tutorial at the end of this post. WampServer is a free application that gives
you the ability to create a web server on your system. It contains Apache2, PHP
and MySQL database and totally compatible with the WordPress. You can make and
manage your database using PhpMyAdmin tool. So before I start with the RePress
proxy let me tell you how to install WordPress on your system:
How to host WordPress on your local machine
Step 1
Download WampServer from the link below and install it. The installation process is like any other Windows application and quite easy.
Step 2
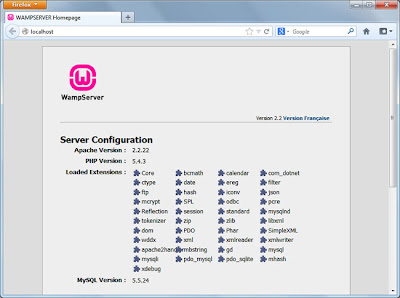
After the installation finished, run the WampServer. You will see its tray icon in your taskbar. Left-click on it and from the menu, select "Start All Services". Its color will change from the red to the green.
Step 3
Again from the menu, choose Localhost to open the Localhost in your system default browser. In this page you can configure your server and database.
Step 4
Download the WordPress from the link below, you will get a zip file. Extract the file in the c:\wamp\www directory. Refer to the image below:
Step 5
Go back to the WampServer Homepage or Localhost and refresh the page. Wordpress project will appear under the "Your Projects".
Before we install the wordPress, we have to create a
database for it. For this click on the phpmyadmin link under the "Your
Aliases".
Step 6
In the phpMyAdmin page, select Databases and then Create
database. Name your new database "wordpress" or whatever you want and then
click on the Create icon.
Step 7
Go back to the Localhost page and click on the wordpress link, under the "Your Projects". On the next page, select the "Create a Configuration File".
Step 8
What we need to do now is to configure our database. Click
on the "Let’s go!" icon. On the next page enter the database name (in our case
wordpress), the user name as "root" and leave the password field empty. Then Submit
the database.
Step 9
The last steps are quite easy and straightforward such as given title name and email address.
Convert Your WordPress Site to a Free Proxy Website
Step 1
If you are using WampServer, then left click on its tray icon and from the menu go to Apache>Apache modules and then select "rewrite-module". After that again Start All Services.
If you use the WordPress with a hosting service provider then
just follow the rest of the steps.
Step 2
In the WordPress dashboard, go to the Settings>Permalinks and then under the Common Settings, choose any option except the Default (you can select any of the available options). Do not forget to Save Changes.
Step 3
Open Plugins>Installed Plugins>Add New and search for
RePress plugin. Then install and activate the RePress plugin.
Step 4
Go back to the Settings>RePress page to modify the
permalink and add domains. The default permalink is "/repress", you can change it
to anything you want like "/proxy".
If you want to open a website with your
WordPress proxy site, in the web browser address bar enter
your-wordpress-address/proxy/webstie.com
For example I used the WampServer
for this tutorial and my WordPress address is "http://localhost/wordpress", if I
want to open wikileaks.org then my path is
http://localhost/wordpress/proxy/wikileaks.org
In general, If you use a hosting service provider or a costume domain name
then you can access blocked websites by adding their address at the end of your
website url like
http://my-wordpress-website/proxy/any-website.com
Step 5
To open any blocked website, first you have to add its
domain to RePress’s proxy list.
That’s it; you just converted your WordPress
site to a Proxy website.


 Tag
Tag

 Home
Home Privacy Policy
 Contact
 About
About Powered by Blogger.